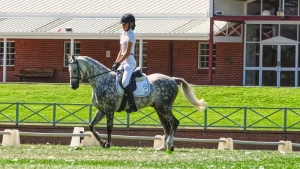
Few things sharpen a horse’s outline like a neat row of horse plaits running down the neck. Plaiting is one of the oldest pieces of stable craft still in daily use — part presentation, part practicality, and a skill that separates a tidy turnout from a scruffy one before a judge has looked at anything else. This guide covers where the tradition comes from, how to prepare the mane, how many plaits to put in, the step-by-step thread method used in the show ring, the main styles worth knowing, and how to plait a tail as well as a mane.
Table of Contents
Where Horse Plaits Came From
Plaiting began as work, not decoration. Long manes tangle in harness, catch in reins and rugs, and take an age to dry. Tying the hair up in bundles kept it out of the way of the collar and the driving lines, and kept it clean enough to be presentable at market. The neatness came first as a by-product; only later did it become the point.
By the eighteenth and nineteenth centuries, turnout had become a signal in its own right. A well-plaited horse advertised a well-run yard, and different plaiting styles helped tell apart horses used for hunting, driving and hacking. As horses moved out of work and into sport and leisure, plaiting settled into the show ring as a mark of respect for the occasion. The tradition survives most visibly in the heavy breeds: Shires, Clydesdales and the Suffolk Punch are still turned out in traditional style, often with a coloured mane roll plaited in and ribbons or flights worked through the crest to draw the eye along the neckline. If that end of the sport interests you, our guide to heavy horse breeds covers how those classes are judged.
Two things follow from that history, and both still matter. First, plaiting is a convention rather than a rule — it signals that you have made an effort. Second, the conventions are regional and disciplinary, so what looks correct in a hunter class looks overdone in a dressage arena.
Preparing the Mane Before You Plait
Almost every bad plaiting job is a preparation problem, not a technique problem. Hair that is too long, too thick, too clean or too soft will not hold a plait no matter how well you fold it.
Get the length right first
A pulled mane of roughly hand-width is the traditional working length, and it is the length every show-ring method assumes. Longer than that and each plait becomes a heavy sausage that flops sideways; much shorter and you cannot get enough hair to fold and stitch. If your horse’s mane is long or uneven, deal with that before show week by pulling the mane properly first rather than trying to disguise it on the morning. Our guide to mane pulling explains the technique and the humane alternatives to it — thinning scissors and a razor comb achieve a similar look without the objections.
If the mane is genuinely unmanageable, or the horse resents having it handled, hogging the mane is an honest alternative. A hogged neck is a legitimate turnout in its own right for cobs and some working horses, and it beats a row of bad plaits.
Wash early, not late
Wash the mane a day or two before you plait, not on the morning. Freshly washed hair is slippery and fights the needle; hair with a day’s natural oil back in it grips itself and holds a shape. Keep the roots and the crest clean, because a dirty crest shows between the plaits and no amount of neat stitching hides it.
On the day, use a dedicated plaiting spray or gel rather than a coat or detangling product. As Naylors Equestrian puts it in its show-ring guide, ordinary mane and tail sprays make the hair too soft to grip — they are designed to do the opposite of what you want here. Damping the hair with plain water works perfectly well if you have nothing else. Keep the relevant kit together in your grooming kit so you are not hunting for a needle in the dark.
What Goes in a Plaiting Kit
A plaiting kit is small and worth assembling properly once. You will need:
- A mane comb, ideally metal, for sectioning cleanly
- Plaiting bands, thread, or both — thread for showing, bands for schooling shows and everyday tidiness
- A large-eyed blunt needle for thread plaits, and a needle threader if your eyesight is honest with you
- Plaiting spray or gel, or a water brush
- Sharp scissors for trimming thread ends
- A stitch unpicker for taking the plaits out again — this is the tool people forget, and picking thread out with scissors is how manes get chopped
- Something to stand on, so you are working above the crest rather than reaching up at it
- Crocodile clips or spare bands to hold sections you are not working on
Thread should match the mane. Black, brown, chestnut and grey cover most horses; white thread on a dark mane reads as a mistake from ten metres away, which is roughly where the judge is standing.
How Many Plaits Should a Horse Have?
This is the single most-asked question about horse plaits, and the honest answer is that there is no fixed number — but there is a firm convention and a sensible range.
The convention is an odd number along the neck, plus one for the forelock. Sources differ on the range. Writing for Horse & Hound, showing producer Katie Jerram-Hunnable notes that traditionally there were seven or nine plaits along the neck with one for the forelock, and adds that most people still opt for an odd number, while advising that you tailor the size and number to the individual horse. Naylors Equestrian gives a higher modern range, suggesting nine to 13 plaits in the mane plus one in the forelock, and recommends sectioning into nine, 11 or 13 to keep them even.
Both are right, because the number is a function of the neck, not of a rulebook. Work from these principles instead of a fixed count:
- Count to the neck, not to a number. A short, thick neck suits more, smaller plaits; a long neck suits fewer, larger ones.
- Thick manes need more plaits. Jerram-Hunnable warns that a mane that is thick as well as long needs a greater number of plaits, or you end up with unsightly ‘golf balls’.
- Keep the odd number if you are showing. It is a convention rather than a requirement, but it is the one experienced judges and producers expect.
- Section the whole mane before you plait any of it. Evenness is far more visible than quantity — 11 even plaits beat nine uneven ones every time.
Which Side Should Horse Plaits Sit On?
Horse plaits sit on the right, or off, side of the neck. That is where the mane is trained to fall in almost every English discipline, and the plaits follow the hair.
The usual explanation is a practical one: you handle, lead and mount from the left, or near, side, so the mane is trained away from you and the horse’s outline stays visible from the side you are not standing on. Whether that is the true origin or a tidy story told afterwards, the convention is universal enough that a mane falling on the left reads as unfinished.
If your horse’s mane insists on falling the wrong way, damp it and plait it over to the right in loose overnight plaits for a week or two before the show, or use a mane-training hood. Do not try to fix it on the morning with product alone.
How to Plait a Horse’s Mane With Thread
Thread is the show-ring method. It gives a tighter, flatter, more secure plait than bands and it is what a judge expects at county level and above. It is slower, which is the trade-off.
- Damp the mane and comb it flat. Work with the hair lying naturally on the off side.
- Section the whole mane first. Divide it into your chosen odd number of even sections and secure each with a band or clip. Use the comb handle to keep the partings straight — wandering partings are the most common giveaway of a rushed job.
- Plait each section down tightly. Keep the tension taut and even from the roots. Jerram-Hunnable’s guidance is to keep the tension taut but even throughout; slack at the top is what makes a plait sag away from the crest an hour later.
- Secure the bottom with thread. Bring the threaded needle up through the bottom of the plait and wrap to fasten it off.
- Fold the plait up. Pass the needle through the base of the plait from underneath, and draw the whole plait up so its end is tucked against the crest.
- Roll or fold it into shape. Roll under for a rounded button, or double the plait up and stitch flat for a hunter plait.
- Stitch through repeatedly to hold the shape, passing the needle through the body of the plait until it is firm and sits square on the crest.
- Trim the thread close and move on. Do not knot bulkily — the lump shows.
Work down the neck in order and finish with the forelock, which is plaited the same way and folded up to sit flat between the ears. Stand back at the halfway point and look along the neck from the front: unevenness is obvious from that angle and invisible from where you are working.
Plaiting With Bands Instead of Thread
Bands are faster, kinder to a beginner’s patience, and entirely acceptable for schooling shows, riding club competition, clinics and everyday tidiness. Search demand for plaiting bands is steady for a reason — most people plait with them most of the time.
The method is the same up to the point of fastening: section, plait down, then secure the bottom with a small band, fold the plait up and secure again with a second band around the base. The result sits slightly rounder and looser than a stitched plait and will not survive a long day as well.
- Match the band colour to the mane, and buy the small, fine bands rather than office elastics.
- Use two bands per plait, one at the bottom and one at the base — a single band lets the plait unroll.
- Do not over-stretch the band; a band wound too tight cuts hair at the root and makes the horse rub.
- Cut bands off with a stitch unpicker or blunt-nosed scissors, never pull them out. Pulling breaks hair at exactly the point where regrowth is most visible.
Types of Horse Plaits and Braids
Most plaiting styles are variations on two ideas: many small plaits set along the crest, or one continuous plait running along it.
Button plaits
Rolled into tight, round balls sitting on top of the crest. The standard for dressage, showing and most affiliated competition. They flatter a well-muscled neck and, set on top of the crest, they can add apparent substance to a neck that lacks it — a genuine optical trick used by professional producers.
Hunter plaits
Flatter and longer than buttons, stitched to lie along the crest rather than sit on it. Traditional for hunting, working hunter and show hunter classes, where the look is workmanlike rather than showy. Usually slightly fewer and larger than dressage buttons.
Running plaits and chaser braids
A single continuous French plait worked along the length of the crest, gathering the mane in as you go. This is the chaser braid, and it is the answer for a long or unpulled mane that you do not want to cut. It is common on event horses and cross-country phases where a tidy, secure mane matters more than formality, and on breeds whose long manes are a defining feature. Horse & Hound’s guidance is to keep taking hair in until you reach the withers, then plait the tail end of the hair down and fasten it off like an ordinary plait.
Scallop and diamond plaits
Decorative styles that link adjacent plaits or sections into a lattice or a row of arcs along the neck. They need a long mane, they take a long time, and they belong at fun rides, mounted games, in-hand displays and Christmas shows rather than in an affiliated ring.
Spanish plaits and long-mane styles
Used on Andalusians, Lusitanos, Friesians and other baroque breeds whose long manes are never pulled. The mane is worked into a continuous decorative plait or left loose and simply banded, according to breed convention.
Western banding
Not plaiting at all: the mane is divided into many small even sections and each is secured flat with a band, producing a smooth ribbed line along the neck. Standard for western pleasure and reining.
False plaits
Ready-made plaits pinned or stitched in to fill gaps in a patchy mane. Legitimate at some levels and frowned on at others, so check the class conditions before relying on them.
How to Plait a Horse’s Tail
Tail plaiting is a separate skill from mane plaiting and it is where turnout is most often let down, because far fewer people practise it. A plaited tail is conventional for showing, hunting and in-hand classes, and optional almost everywhere else.
The method below follows the step-by-step Katie Jerram-Hunnable sets out in her tail-plaiting guide for Horse & Hound, drawn from her book Modern Horse Management.
- Take a small piece of hair from each side at the top of the tail and cross them over, then take a third piece from one side. That gives you the three sections of your plait.
- Take in extra hair each time you pass a side piece over the centre one, so you build bars of hair down each side of the dock with a central plait running between them.
- Take the same amount of hair each time and keep the plaiting taut. Those two points do more for the finished look than anything else.
- Plait down to a level that suits your horse’s conformation — usually about two-thirds of the way down the dock.
- Finish the remaining length as a simple plait, fold it under and stitch it neatly out of sight.
- Travel in a tail bandage or guard as usual, but remember you will need to unwrap it rather than slide it off.
One honest caveat from the same source: this only works if the hair at the top of the dock is long enough to get the plait started. A tail that has been pulled short at the top cannot be plaited, which is the trade-off between the two traditional ways of tidying a tail. Decide which look you want before you pull anything.
Mud tails for hunting
A mud tail, or mud knot, fastens the long hair below the dock so it does not get soaked and caked on a wet day. Plait the top of the tail as above, plait the long hair below the dock into a single tail, stitch the bottom, then double it up and stitch it down the centre like a mane plait. Horse & Hound flags a real risk worth repeating: the tail becomes solid and heavy, and if the horse swishes it, it can hit them on the flanks and provoke an undesirable reaction. Check your horse tolerates it at home before doing it on a hunting morning.
What not to do to a tail
Plaiting shapes a tail temporarily and harmlessly. tail setting — altering tail carriage by surgical or mechanical means — is a different matter entirely, is prohibited in the UK, and has no place in modern turnout. A naturally full or bushy switch tail needs no correction; plait it, or leave it well alone and simply keep it clean.
For travelling, a well-applied tail bandage protects the top of the tail from rubbing. Never leave one on longer than the journey, and never apply it tight enough to leave a mark.
Matching Plaits to Your Horse’s Conformation
Good plaiting responds to the horse in front of you. Reading conformation properly is what turns competent plaiting into flattering plaiting.
- Short, thick neck: more, smaller plaits, set on top of the crest, spaced evenly to draw the eye along the length rather than emphasise the depth.
- Long, fine neck: fewer, larger plaits sitting slightly lower, so the neck does not look longer still.
- Weak or under-muscled topline: plaits set on top of the crest add apparent substance where there is none — the trick Jerram-Hunnable describes as an optical illusion.
- Cresty or overtopped neck: smaller, flatter plaits set slightly to the side, which avoids adding height to a crest that already has plenty.
- Ewe neck: even, moderate plaits along the full length, finishing well down towards the withers to lengthen the topline visually.
When to Plait and How to Take Plaits Out
Plait as close to the class as you sensibly can. Jerram-Hunnable’s stated preference in Horse & Hound is to plait on the morning of a show, even though that may mean working in the dark — and that is the right instinct. Plaits are at their best within a few hours of being put in.
Plaiting the night before is a common compromise for an early start, and it is a compromise rather than best practice. If you do it, the risks are worth understanding: a tight plait pulls at the roots, a horse that rubs a plaited mane against a wall or a rug can pull out a chunk of hair that cannot escape the plait, and a plait that snags on something while you are not there can tear hair out at the root. Sew loosely, keep the horse in, and take them out as soon as the class is finished rather than leaving them in for convenience.
Coming out matters as much as going in:
- Use a stitch unpicker, working from the underside where you can see the thread.
- Never cut blind into the plait with scissors — this is how manes end up with a stepped, chopped line that takes a season to grow out.
- Take bands off with the unpicker too, rather than dragging them down the hair.
- Brush the mane through afterwards and let it settle; the kinks drop out within a day.
What Different Disciplines Expect
Turnout conventions vary by discipline and by level, and they are conventions, not universal rules. Governing-body rulebooks are updated annually and are the place to check anything you intend to rely on — the current British Dressage competition rules are the reference point for affiliated dressage, and the equivalent showing societies publish their own class conditions.
- Showing and in-hand: the highest standard. Thread plaits, an odd number, tail plaited, and turnout judged as part of the class. See our guide to in-hand showing for the wider picture.
- Working hunter and hunting: hunter plaits, flatter and workmanlike, tail plaited or pulled.
- Dressage: button plaits are the norm at every level, and expected even where not required.
- Eventing: plaited for dressage; running plaits or a tidy mane are common for cross-country.
- Show jumping: plaiting is customary at affiliated level and relaxed at unaffiliated shows.
- Western: banding rather than plaiting; conventions differ entirely from English classes.
- Riding club and unaffiliated: bands are perfectly acceptable. Neat and even beats elaborate and crooked.
Horse Plaiting FAQ
How many plaits should a horse have?
An odd number along the neck plus one for the forelock is the convention. Horse & Hound records seven or nine as the traditional count, while Naylors Equestrian suggests a modern range of nine to 13 plus the forelock. Match the number to the neck: more, smaller plaits for a short thick neck, fewer and larger for a long fine one.
Which side should horse plaits be on?
The right, or off, side. The mane is trained to fall that way in English disciplines, and the plaits follow it. A mane falling on the left reads as unfinished in a show ring.
Does plaiting hurt the horse?
Correctly done, no — hair has no feeling. Discomfort comes from tension at the roots, from plaits left in too long, or from rough removal. If a horse starts rubbing a plaited mane, the plaits are too tight and should come out.
Can I plait a mane that has not been pulled?
Yes. A running plait or chaser braid is designed for exactly that, and scallop styles suit long manes well. Traditional button and hunter plaits assume a pulled mane of roughly hand-width.
Should I plait for an unaffiliated show?
It is not required, but it is worth doing. Plaiting with bands takes far less time than thread and signals that you have made an effort, which is the whole point of the convention.
How long does plaiting take?
Expect a first attempt with thread to take considerably longer than you planned, and a practised hand to be much quicker. This is a skill that rewards practice at home on an ordinary weekday far more than practice at 5am on a show morning.
Plaiting is one of those stable skills that looks fussy from outside and obvious once you can do it. Practise on a quiet day, learn what suits your own horse’s neck, and it stops being a show-morning ordeal and becomes ten minutes of routine.