How to Tack Up a Horse: The Full Step-by-Step Sequence
Tacking up a horse, meaning putting on the saddle, girth, bridle and any supporting equipment, is one of the first practical skills a new rider has to learn and one of the few that genuinely cannot be rushed. Get the order wrong and you create a safety problem. Get the fit wrong and you create a sore horse. This guide covers the full English sequence from preparation through to the final check, explains where Western tacking up differs, and sets out what the British Horse Society actually assesses, rather than what the internet says it assesses.
It also covers something most tacking-up guides published before 2025 get wrong: the two-finger noseband test is no longer the standard at international level. The FEI replaced it with a measured protocol in May 2025. More on that below, because it changes the advice in almost every beginner guide currently ranking for this topic.
Tacking Up at a Glance
- Order: Organise tack, secure the horse, groom, numnah, saddle, girth, bridle, final check.
- Time: Roughly 10 to 15 minutes including grooming once you are practised. Allow longer while learning.
- The cardinal rule: Saddle on first, bridle on last. Never leave a horse tied up wearing a bridle.
- Untacking: The reverse. Bridle off first, saddle off last.
- Side: Work primarily from the nearside (the horse's left). Only the girth billets on the far side are done from the offside.
What the BHS Stage 1 Care Syllabus Actually Requires
Tacking up is an assessed element of BHS Stage 1 Care, so it is worth knowing what the syllabus says rather than relying on stable-yard folklore. The published Stage 1 Care syllabus is built around eight learning outcomes, covering yard responsibilities, mucking out, routine grooming, describing horses and their behaviour and health, rugs, tacking up and untacking, handling, and feeding and watering.
The tacking-up outcome itself is short and specific. The syllabus asks candidates to tack up and untack "to include: Safe and efficient procedure, Securing the horse, Handle horse safely, Handling of rug if required, Carrying and storage of tack."
Three things follow from reading the actual document:
- Grooming is a separate outcome, not part of the tacking-up assessment. It still matters enormously for the horse's back, but it is assessed in its own right.
- Carrying and storing the tack is assessed. How you pick a saddle up and where you put it down counts, which surprises a lot of candidates.
- No time limit is published for the practical tasks, and the syllabus contains no mnemonic. If you have seen a "BHS tacking-up mnemonic" quoted online, it did not come from the syllabus.
Tack cleaning is assessed separately and in more detail than most people expect. The syllabus specifies stripping the bridle, cleaning and applying a leather dressing such as saddle soap, cream or spray, washing the bit, and putting the bridle back together correctly. That last point is the one that catches candidates out.
The Pony Club covers the same ground at junior level in its D and D+ tests, and full details of the wider qualification route sit on the BHS Stage 1 page.
Step 1: Organise the Tack Before You Touch the Horse
A horse standing tied while you hunt for the right girth is a horse learning to fidget. Lay everything out first:
- Saddle with the numnah or pad already attached, stirrup irons run up, and the girth buckled onto the offside billets.
- Saddle resting on a saddle horse or rack, never balanced on a stable door.
- Bridle buckled up with the snaffle or other bit fitted and the throatlatch and noseband set roughly to size, hanging on a clean hook.
- Grooming kit to hand: hoof pick, dandy brush, body brush, sponges.
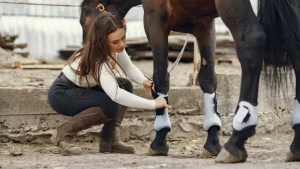
- Boots or bandages if used. These go on after the saddle and bridle but before you lead out.
If a martingale is being used, thread it onto the bridle and girth before you start rather than trying to add it later.
Step 2: Secure the Horse Safely
Tie the horse to a loop of breakable twine attached to the tie ring, never directly to the ring itself. The twine is the safety device: if the horse panics and pulls back, the twine snaps before the horse injures its neck or pulls the fitting out of the wall. Use a quick-release knot that unties with a single pull on the free end.
The horse stays in its headcollar throughout tacking up. Never tie a horse up by the bridle or leave it tied with a bit in its mouth. A horse that pulls back against a bit can do itself serious and lasting damage.
Step 3: Groom Before the Saddle Goes On
This step is not optional. Grit, dried mud or shavings trapped under the numnah act like sandpaper once the rider's weight is on the saddle, and rubs can appear in a single ride.
- Pick out the feet. Work heel to toe on all four, checking for stones, thrush and loose or risen clenches on shod horses. Our guide to cleaning a horse's hoof covers the technique in detail.
- Dandy brush the mud off, working in the direction of the coat, concentrating on the saddle and girth areas.
- Body brush the coat, mane and tail. Stand to the side, never directly behind.
- Sponge eyes and nose, using a separate sponge for each end.
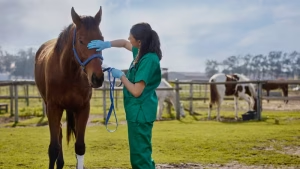
- Run a flat hand over the withers, back and girth area, feeling for heat, swelling, cuts or flinching. Any unusual reaction means stop and speak to your instructor or vet before tacking up.
Step 4: Position the Numnah and Saddle
- Stand on the nearside, the horse's left.
- Place the numnah slightly forward of its final position, then slide it back so the coat hairs lie flat underneath. Never push a pad forwards against the lie of the coat.
- Lift the saddle on gently, again slightly too far forward, and slide it back into the natural hollow behind the shoulder blade. Dropping a saddle onto a horse's back teaches it to flinch every time you approach with one.
- Check clearance. You should be able to see daylight through the gullet from front to back, and the pommel should clear the withers when a rider is mounted, not just when the saddle is empty.
- Pull the front of the numnah up into the gullet so it is not stretched tight across the withers. This is the single most common numnah fault.
- Attach all the numnah straps to the saddle. Loose straps flap and rub.
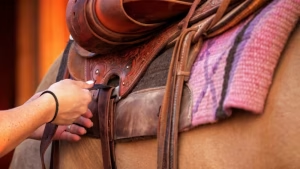
Step 5: Attach and Tighten the Girth
- Walk round the front of the horse to the offside, lift the saddle flap and let the girth hang down.
- Return to the nearside, reach under the belly and take hold of the girth. Never duck under the horse's neck or belly.
- Buckle the girth onto the same numbered billet straps on both sides, with the buckle guards pulled down over the buckles.
- Tighten in stages. Snug first, then walk the horse a few steps, then tighten again, and check once more immediately before mounting.
- Stretch each foreleg forward in turn once the girth is done up. This pulls the skin and hair out from under the girth and helps prevent girth galls.
Why the first and third billet straps?
Most English saddles have three billet straps, and the convention is to use the first and third. The reason is structural rather than arbitrary. On a typical saddle the first billet is a point strap, attached to its own webbing around the point of the saddle tree, while the second and third share a separate web. Girthing up on the first and third means the saddle is held by two independent webs, so a single web failure should not put the rider on the floor.
Two caveats worth knowing. Saddles vary, and not every saddle is built this way, so if you are unsure which of your straps share a web, ask your saddle fitter rather than assuming. And whichever combination you use, use the same two on both sides, or the saddle will sit crooked.
How tight should the girth be?
You should be able to slide a flat hand, palm against the horse, between the girth and the horse's side just behind the elbow. If you cannot get a hand in, it is too tight. If the saddle shifts when you rock it, it is too loose. Many horses inflate their chest when first girthed, so the check after walking on matters more than the one at the tie ring.
Step 6: Put the Bridle On
The bridle goes on last so the horse never stands tied with a bit in its mouth.
- Untie the horse and put the reins over its head onto the neck, so you have a means of control.
- Undo the headcollar and refasten it loosely around the horse's neck. You keep hold of the horse without leaving its head completely free.
- Stand on the nearside facing the same way as the horse. Hold the bridle headpiece in your right hand, level with the horse's eye, with the bit resting on your flat left palm.
- Ask the horse to open its mouth by slipping your left thumb into the bar of the mouth, the toothless gap behind the incisors. Most schoolmasters open straight away.
- Guide the bit in and lift the headpiece up and over the ears, folding each ear forward gently rather than bending it back.
- Pull the forelock out over the browband and free the mane from under the headpiece.
- Fasten the throatlatch. A hand's width, roughly four fingers, should fit between it and the horse's cheek.
- Fasten the noseband two fingers below the projecting cheekbone. See the section below on how tight it should be, because the standard advice has changed.
- Remove the headcollar completely and hang it up.
Check the bit height while you are there. A correctly fitted snaffle sits with about one soft wrinkle at the corner of the mouth. If you are unsure about size or fit, see our guides to measuring for a bit and fitting a bit correctly. Riders using a bitless setup should read our explanation of the English hackamore instead.
Noseband Tightness: Why the Two-Finger Rule Is Being Retired
Almost every beginner guide still teaches "two fingers under the noseband". It is a reasonable rule of thumb, but the research behind noseband welfare has moved on, and if you compete under FEI rules it is no longer the test that will be applied to you.
The problem with fingers is that they are not a unit of measurement. Assessors' fingers differ in size, and there was never agreement on where to take the reading or how to orient the hand. A noseband can be tight enough to restrict blood flow and trigger a physiological stress response while still admitting a finger at the side of the face.
Two developments matter:
- The ISES taper gauge. The International Society for Equitation Science designed a tapered gauge so that noseband tightness could be measured rather than estimated. Inserted without force up to the stop, it corresponds to a gap of at least 1.5cm. ISES set out its wider concerns about restrictive nosebands in a position statement first published in 2019.
- The FEI protocol. From 1 May 2025 the FEI standardised noseband tightness across all its disciplines. Stewards use a purpose-built FEI Measuring Device, 1.7cm thick, and it must pass under the noseband at the nasal bone, on the front of the nose rather than at the side of the face.
For everyday riding you do not need a gauge in your pocket. The practical takeaway is simpler and more useful than the old rule: measure at the front of the nose, not the side, and make the gap generous. If your noseband only just admits two fingers laid flat against the side of the horse's jaw, it is very likely tighter than either the ISES or the FEI standard would allow.
Step 7: The Final Check
Walk once around the horse before you lead out and confirm:
- Saddle straight, sitting behind the shoulder, numnah pulled up into the gullet.
- Girth even on both sides, same billets, buckle guards down, flat-hand test passed.
- Bridle straight on the face, browband not pinching the base of the ears, throatlatch at a hand's width, noseband correctly positioned and not overtightened.
- Bit level, with roughly one wrinkle at each corner of the mouth.
- Reins over the head and not twisted or caught.
- Stirrups still run up until you are ready to mount.
- Boots or bandages on, rug removed, nothing left fastened that should not be.
Western Tacking Up: Where It Differs
The principles are identical. The kit is heavier and the vocabulary changes:
- A saddle blanket or pad replaces the numnah, and is positioned the same way, forward then slid back.
- The Western saddle is considerably heavier than an English one, commonly 15kg or more. Hook the offside stirrup and the cinch over the horn before you lift, so nothing swings under the horse's belly as the saddle lands.
- The cinch replaces the girth and is secured with a latigo, tied in a knot resembling a necktie rather than buckled. Tighten in stages exactly as you would an English girth.
- A rear cinch, where fitted, is done up after the front cinch and should sit snug against the belly, never loose. A loose rear cinch is a genuine hazard because a hind leg can get through it.
- Western bridles often have no noseband and sometimes no browband, using a one-ear or split-ear headstall instead.
- Mounting from the left is the convention in Western riding too.
Common Tacking-Up Mistakes
- Tightening the girth in one go. The fastest way to create a girthy, ear-pinning horse. Always do it in stages.
- Numnah stretched flat across the withers. Creates direct pressure exactly where you least want it. Pull it up into the gullet every time.
- Saddle too far forward. It sits on the shoulder blade, restricts the foreleg and causes back soreness. Slide it back into the hollow.
- Mane trapped under the headpiece. Uncomfortable and easily missed. Check every time.
- Different billets each side. Pulls the saddle crooked and loads one side of the back unevenly.
- Buckle guards left up. Bare buckles chew through the saddle flap and wear the billets.
- Noseband done up by feel alone. See the section above. Fingers are not a reliable gauge.
- Stirrups left down while leading. They swing, bang the horse's sides and catch on door frames.
- Forgetting to re-check the girth. The one that puts riders on the floor at the mounting block.
Untacking: The Reverse Sequence
- Run the stirrups up the leathers as soon as you dismount.
- Loosen the girth a few holes but leave it attached while you fetch the headcollar.
- Undo the noseband and throatlatch, put the reins over the head, and slide the headpiece forward over the ears, letting the horse drop the bit out of its own mouth rather than pulling it out against the teeth.
- Put the headcollar on and tie the horse up.
- Undo the girth on the nearside and lay it across the seat, or let it hang on the offside.
- Lift the saddle and numnah off together and put them straight onto a rack.
- Check the back and girth area for rubs, heat or swelling while the horse is still warm.
- Sponge or brush off sweat marks, pick out the feet, and rug up if required. Our horse rugging guide covers what to use and when.
Cleaning Tack After the Ride
The BHS assesses tack cleaning in its own right at Stage 1, and the criteria are a good everyday routine in themselves: strip the bridle, clean the leather and apply a dressing, wash the bit, and reassemble the bridle correctly.
- Wash the bit in clean water after every ride. Dried saliva and feed set hard and are unpleasant in the mouth next time.
- Wipe the leather down with a damp, not soaking, sponge. Sweat contains salts that dry leather out and rot the stitching.
- Condition regularly with a proper leather dressing. Effax and Carr & Day & Martin, whose Belvoir range is the one most UK yards will recognise, are both widely used.
- Check the stitching monthly on girths, stirrup leathers, billets and reins. Leather tack usually gives warning before it fails, but only if somebody looks.
- Reassemble correctly. Rebuilding a stripped bridle so that every keeper and runner is used is a genuine skill and an assessed one.
Frequently Asked Questions
What is the correct order to tack up a horse?
Organise the tack, secure the horse in a headcollar, groom thoroughly, place the numnah then the saddle, attach and gradually tighten the girth, and put the bridle on last. Finish with a walk-round check of every strap and buckle. The saddle always goes on before the bridle so the horse is never tied up wearing a bit.
Which side do you tack up a horse from?
The nearside, meaning the horse's left. Horses are conventionally handled, led and mounted from the left, and tack is fitted from that side by default. The only routine exception is buckling the girth onto the offside billets, which is done from the right before you go back round to the left.
How tight should a horse's girth be?
Tight enough that you can slide a flat hand between the girth and the horse just behind the elbow, and that the saddle does not shift when you rock it. Tighten in stages, walk the horse a few steps, and check again before you mount. Horses commonly inflate their chest when first girthed, so the first reading is rarely the true one.
How tight should a noseband be?
Looser than most riders think, and measured at the front of the nose rather than at the side of the jaw. The ISES taper gauge corresponds to a gap of at least 1.5cm, and since 1 May 2025 FEI stewards have used a 1.7cm measuring device applied at the nasal bone. The old two-finger test is unreliable because finger sizes and hand positions vary.
How long does it take to tack up a horse?
Around 10 to 15 minutes including grooming once you are practised, and noticeably longer while you are learning. The BHS does not publish a time limit for the Stage 1 practical, and rushing is more likely to be marked down than working steadily.
Why does the bridle go on last?
So the horse is never left tied up wearing a bit. A tied horse that pulls back against a bridle can cause itself severe mouth injuries. The headcollar stays on until the saddle and girth are done, then the horse is untied and the bridle fitted with the reins already over its neck for control.
What is the 20% rule for horses?
It is a widely quoted guideline that a horse should carry no more than about 20% of its bodyweight in rider and tack combined. It traces to a 2008 Ohio State study by Powell and colleagues, which loaded eight riding horses at between 15% and 30% of bodyweight and found markedly higher heart and respiratory rates, plus more muscle soreness the following day, at 25% and 30%. It is a useful ceiling rather than a hard limit, the sample was small, and later work has not always reproduced the effect. It is relevant to tacking up because the figure includes the saddle, and a Western saddle can add 15kg or more before the rider gets on.
Related Reading
For the individual components referred to above, see our guides to the parts of the saddle, types of snaffle bit and how to hold the reins correctly. If you are at the very start, our complete guide to riding for beginners and our 12 essentials before your first lesson are the natural next reads.