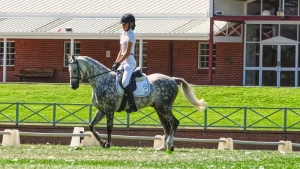
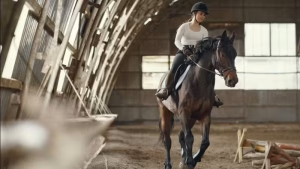
Horse riding for beginners can feel daunting — the horse is big, the ground is a long way down, and the whole thing looks far more complicated from below than it does when you watch someone else do it. The good news is that everyone feels this way at the start, and the basics are simpler than you think. This guide covers everything you need to know before and during your first riding lessons: what to wear, how to mount, how to sit, how to steer, and how to ride a horse confidently from walk through trot to canter.
Table of Contents
What to Wear for Your First Riding Lesson
You do not need to buy specialist clothing for your very first lesson — most riding schools provide a hat. But the right basics make a big difference to your comfort and safety:
- Helmet: A correctly fitted, current-standard riding hat is compulsory at all BHS-approved riding schools. Most schools lend helmets, but if you buy your own, look for the PAS 015 or VG1 01.040 2014-12 safety mark. It must fit snugly without being tight, and the chin strap must fasten securely.
- Trousers: Long trousers with a close fit — jodhpurs or riding tights are ideal, but jeans or thick leggings work for a first lesson. Avoid loose, flappy fabric that can catch on the saddle, and avoid shorts (your inner legs will be rubbed raw).
- Footwear: A boot or shoe with a small heel (1–2 cm) and a smooth sole. The heel prevents your foot sliding through the stirrup. Avoid trainers (the sole grips the stirrup and can trap your foot), sandals, and anything open-toed. Ankle-height riding boots or short paddock boots are ideal; a Chelsea boot or similar smooth-soled ankle boot works for a first session.
- Gloves: Not essential for lesson one, but riding gloves or thin leather gloves prevent the reins from rubbing your hands — particularly useful once you start working in trot.
- Body protector: Not compulsory for most riding school lessons, but strongly recommended if you plan to jump or hack out in the countryside. A BETA Level 3 body protector is the standard choice.
Finding a Riding School
The quality of your riding school makes an enormous difference to your early experience. Look for:
- BHS approval: The British Horse Society inspects and approves riding centres that meet its standards for horse welfare, instruction quality, and facility safety. A BHS-approved yard is the safest choice for a beginner. You can search the BHS directory at bhs.org.uk.
- Qualified instructors: At minimum, your instructor should hold a BHS Stage 2 coaching qualification or equivalent (UKCC Level 2). Many riding schools list their instructors’ qualifications on their website.
- Suitable horses: A good riding school matches the horse to the rider. As a beginner, you should be put on a calm, experienced horse that is used to novice riders — not a young, sharp, or reactive animal.
- Group size: Smaller groups (4–6 riders) mean more individual attention. Private lessons are the fastest way to learn but are more expensive. A common approach is to take a few private lessons to learn the basics, then move to group sessions once you are comfortable in walk and trot.
Before You Get On
Spend a few minutes with the horse before mounting. Approach from the front or front-quarter so the horse can see you (horses have a blind spot directly behind them). Let it sniff your hand, stroke its neck, and talk calmly. This is not just about the horse’s comfort — it helps your nerves too.
Your instructor will usually help you check the girth (the strap that holds the saddle on) is tight enough, and adjust your stirrups to the approximate length before you mount. Learning to do it yourself is the natural next step: see our guide to tacking up a horse. Once you are in the saddle, they will fine-tune the stirrup length so your ankle bone sits level with the stirrup bar when your legs hang naturally.
How to Mount a Horse
Most beginners mount from a mounting block — a set of steps that brings you level with the saddle. This is easier on both you and the horse.
- Stand on the mounting block on the horse’s left (near) side.
- Hold the reins in your left hand, resting on the horse’s neck, short enough to have a light contact but not pulling.
- Place your left foot in the stirrup, turning your toe slightly inward so you do not dig the horse’s side.
- Spring up, swinging your right leg smoothly over the horse’s back. Avoid kicking the horse’s hindquarters as your leg goes over.
- Lower yourself gently into the saddle — do not drop down heavily.
- Slip your right foot into the right stirrup and settle your weight evenly.
If there is no mounting block, you can mount from the ground, but this requires more strength and puts more strain on the horse’s back. Your instructor will help steady the horse and guide you through the process.
The Correct Riding Position
Good position is the foundation of all riding — it affects your balance, your communication with the horse, and your safety. The classical position follows a straight line from your ear, through your shoulder, hip, and down to your heel:
- Head: Look up and ahead, not down at the horse’s neck. Where you look is where you go.
- Shoulders: Relaxed and level, not hunched or tipped forward. Imagine a string pulling you up from the top of your head.
- Arms: Elbows bent, held close to your sides. A straight line should run from your elbow, through your forearm, along the rein to the horse’s mouth.
- Hands: Held as though you are holding two cups of tea: thumbs on top, fingers closed around the rein, wrists soft and straight.
- Seat: Sit in the deepest part of the saddle with your weight even on both seat bones. Your lower back should be gently curved (not hollow or rounded), allowing your pelvis to follow the horse’s movement.
- Legs: Long and draped around the horse, with the ball of your foot on the stirrup and your heels pressed down. Your toes should point forward or very slightly outward. The inside of your calf should rest lightly against the horse’s side.
- Heels: Down. This is the single most important positional rule for safety — a dropped heel anchors your leg and prevents your foot from sliding through the stirrup.
Nobody achieves perfect position on day one. It takes time for your muscles to develop the strength and memory for a balanced, effective seat. Be patient with yourself. For a detailed breakdown of leg, seat, and hand position, read our guide to the correct horse riding position.
How to Steer and Stop
Horses respond to a combination of seat, leg, and hand aids. As a beginner, you will start with the simplest versions:
- To turn: Open (move outward) the rein in the direction you want to go. If you want to turn right, move your right hand slightly to the right while keeping a steady left rein. Support with your inside leg at the girth and your outside leg slightly behind the girth.
- To stop (halt): Close your fingers on both reins, stop following the horse’s movement with your hips, and sit tall. Think of it as closing a door rather than pulling — a gentle squeeze of the reins combined with a braced core is far more effective than hauling backward.
- To slow down: Half-halt — a momentary squeeze-and-release of the reins combined with a deepening of your seat. This tells the horse to rebalance and slow without coming to a full stop.
At the beginner stage, your instructor will often control the pace through voice commands to the horse. Your job is to focus on position and slowly start applying aids as your confidence grows.
Learning to Walk
The walk is a four-beat gait — each of the horse’s legs moves independently. It is the slowest and most comfortable gait, and where every rider begins.
To ask for walk from halt, give a gentle squeeze with both lower legs against the horse’s sides and soften your hands forward slightly to allow the horse to move. At walk, focus on:
- Keeping your hips relaxed and following the horse’s movement (your seat will rock gently from side to side)
- Maintaining a soft, elastic contact on the reins — the horse’s head nods at walk, and your hands need to follow that movement
- Looking ahead, not down
- Breathing! Nervous riders tend to hold their breath, which tenses your whole body
Most beginners spend their first 2–4 lessons primarily at walk, and there is absolutely nothing wrong with that. Walk is where you build the fundamental position and confidence that everything else is built on.
Learning to Trot
The trot is a two-beat gait where the horse’s legs move in diagonal pairs — the left fore and right hind move together, then the right fore and left hind. It is bouncier than walk, and learning to ride it comfortably is the first real skill challenge for a beginner. For a deeper look at rising trot, sitting trot, and diagonals, see our full guide to horse trotting.
There are two ways to ride trot:
Sitting Trot
You sit in the saddle and absorb the bounce through your lower back and core. This is harder than it sounds — beginners tend to bounce against the saddle, which is uncomfortable for both rider and horse. Sitting trot requires a relaxed, supple lower back and strong core muscles.
Rising Trot (Posting Trot)
You rise out of the saddle on one beat and sit on the next — “up, down, up, down.” The horse’s movement does most of the work; you simply allow it to push you up and control the descent back down. Rising trot is much more comfortable and is what most beginners learn first.
The key to rising trot is rhythm. Let the horse’s movement set the tempo. Common mistakes include rising too high (you only need an inch or two out of the saddle), gripping with the knees (which pushes your lower leg backward), and tipping forward. Trust the rhythm, keep your heels down, and it will click — usually within a few lessons.
Once you are comfortable in rising trot, your instructor will introduce diagonals — riding on the correct diagonal pair so that you rise when the outside foreleg moves forward. This helps the horse balance on turns and circles.
Learning to Canter
The canter is a three-beat gait with a distinctive rocking-horse rhythm. Many beginners are nervous about cantering, but most find it surprisingly comfortable once they relax into it — the motion is smoother and more rolling than trot.
To ask for canter, your instructor will typically have you on a circle in trot, then ask you to:
- Sit to the trot (stop rising)
- Keep your inside leg at the girth
- Move your outside leg back behind the girth
- Give a nudge with both legs
In canter, sit deep, keep your hips moving with the horse’s rhythm, and maintain a steady rein contact. The common beginner mistake is to lean forward and grab the mane — instead, sit back, open your chest, and let your hips follow the motion. If you feel unbalanced, holding the front of the saddle or a neckstrap is perfectly fine while you find your balance.
Most riders learn to canter after 8–15 lessons, though this varies enormously depending on the rider’s natural balance, confidence, and the quality of the school horse.
Common Beginner Mistakes
- Looking down: Your head weighs about 5 kg. If you look down, your whole upper body tips forward, destroying your balance. Look where you are going — always.
- Gripping with the knees: This pushes your lower leg back and lifts you out of the saddle. Drape your legs long and think “heavy legs.”
- Pulling on the reins to balance: The reins are for communicating with the horse, not for staying on. If you need to grab something for balance, hold the front of the saddle or a neckstrap.
- Holding your breath: Tension in your body transfers directly to the horse. Breathe out consciously, especially when you feel nervous. Count your breaths if it helps.
- Tipping forward in transitions: When the horse changes pace (walk to trot, trot to canter), beginners often fold forward. The solution is counter-intuitive: sit up taller and open your chest as the horse goes up a gear.
- Being too hard on yourself: Riding is a complex physical skill that coordinates multiple muscle groups simultaneously while communicating with a living animal. Nobody masters it quickly. If you can walk, trot, and steer after ten lessons, you are doing well.
Building Confidence and Progressing
Confidence in riding comes from two things: competence and trust. Competence builds through regular practice — try to ride at least once a week if you can, as longer gaps between lessons mean more time re-learning what your body had started to remember. Trust builds through positive experiences with calm, reliable horses and patient, encouraging instructors.
As you progress beyond the basics, the equestrian world opens up enormously:
- Hacking (trail riding): Riding out in the countryside — many riders’ favourite part of the sport
- Dressage: The art and sport of training a horse to perform precise movements
- Show jumping: Jumping a course of coloured fences against the clock
- Eventing: A three-phase competition combining dressage, cross-country, and show jumping
- Endurance riding: Long-distance riding across open country
- Polo, horseball, mounted games: Team sports on horseback
The British Horse Society’s progressive award scheme (Challenge Awards and Ride Safe) provides a structured pathway for adult learners, and many riding schools offer courses specifically designed for adult beginners.
Frequently Asked Questions
Am I too old to start horse riding?
No. People start riding at every age, and many riding schools run dedicated adult beginner sessions. Riding is a low-impact activity that improves core strength, balance, and mental wellbeing. As long as you are reasonably mobile and not carrying a serious injury, there is no upper age limit. Many successful riders started in their 40s, 50s, and beyond.
How much does a horse riding lesson cost in the UK?
Group lessons typically cost £30–£50 per hour depending on location, with London and the South East at the higher end. Private lessons range from £40–£70+. Most riding schools offer introductory packages (e.g., four lessons at a reduced rate) for beginners. Hat hire is usually included or costs a small additional fee.
How long does it take to learn to ride a horse?
Most beginners are comfortable at walk and trot after 6–10 weekly lessons, and can canter with reasonable confidence after 10–20 lessons. However, riding is a lifelong learning journey — even professional riders continue to develop their skills. The goal is not to “finish” learning but to reach a level where you can enjoy riding safely and progress at your own pace.
Do I need to be fit to start horse riding?
A basic level of fitness helps, but you do not need to be an athlete. Riding itself builds the specific muscles you need — particularly your core, inner thighs, and postural muscles. You will likely ache after your first few lessons (especially in muscles you did not know you had), but this fades as your body adapts. If you have any medical conditions that affect your balance, mobility, or cardiovascular health, mention them to the riding school when you book.
What should I do if I fall off?
Falls are a normal part of learning to ride — the saying “you haven’t lived until you’ve fallen off seven times” exists for a reason. If you fall, stay still for a moment, check that nothing hurts beyond general bruising, and get back on if you feel able to. Getting back on promptly (even just for a walk around the arena) prevents a fall from becoming a lasting fear. If you are injured, stay still and let your instructor manage the situation. Wearing a correctly fitted hat and a body protector significantly reduces the risk of serious injury.